
Mobilize your content: A FrameMaker Digital Publishing Overview
I love it when things that sound difficult turn out to be easier than I expect. And FrameMaker’s digital publishing feature is squarely in that category.
In fact, if you’re finding this post after reading post 2 or 3 in the series, and don’t mind skipping some fine reference material, you can skip down to Delivering HTML5 From FrameMaker 2015. But if you’re still on the fence about whether you should be publishing your content for the web and mobile (really, that’s still a question?) then you should know this one thing:
Every writer can easily deliver mobile output using FrameMaker because all the basic steps are done for you.
Here’s the situation:
- Your audience needs something beyond print and PDF. They want faster doc turnaround times, intuitive access to the content, and most of all, want to use whatever device they are in front of at the moment.
- Your organization has decided that you are the “perfect” person to spearhead this ambitious campaign to mobilize your content.
You could purchase (and learn) new processing software, do an expensive conversion to a new platform, or (wait for it…) use FrameMaker, the workhorse software that tech comm professionals have relied on for 25 years. Need it quick? In less time than it takes to read this short post, you can have beautiful mobile output of your content, ready for delivery.
Of course, the formatting and branding won’t look like your organization’s website, but that’s where part two of this series comes in…showing you how to make some basic changes to the default processing to more closely match your other content.
If your organization is already looking to provide offline digital access, in the form of a mobile app, then you’ll want to read both part two and part three of this series. In part three, I’ll show you how to produce an Android app for testing on your own device, and point you to the non-Adobe tasks that you need to perform to distribute your content on the Google and Apple app stores.
Along with the publishing demo that I’ve outlined here, you can also view recordings of all three webinars in this series:
- Mobilize your content: A FrameMaker Digital Publishing Overview (this post)
- Mapping Styles and Setting Up Mobile Web Output
- Setting Up and Installing Mobile Apps
Each webinar has an accompanying post and video, and you can view the other posts at:
Many thanks to Adobe for sponsoring this webinar series, which lets me share the FrameMaker digital publishing process with you.
Enjoy!
-Matt Sullivan
Getting started
In this first of three posts, I’ll discuss
- some best practices for your FrameMaker (or any other) content
- using a template-based workflow
- the default options for the Publishing pod
The steps provided will also work (mostly) the same in FrameMaker 12, but I recommend you use the most current version of FrameMaker for the best experience. At the time of writing, the most current version is FrameMaker 2015 v. 3.1
My main goal is to show you how easy default processing is, and how easily you can produce the many formats provided. But enough of the intro…let’s get started!
Best practices
While you can write a book about FrameMaker best practices (like FrameMaker – Working with Content), for this post, you should keep the following things in mind:
- Opening all the files in your book prior to processing allows you to address any dialogs or errors that occur when opening files. This includes messages about missing resources like fonts and graphics.
- Performing an Update Book allows you to address any dialogs or errors in your content. This includes inconsistencies in displaying conditional text if conditional text is used. These types of dialogs can prevent you from processing your content for digital output. While some can be masked with a Don’t Show Again option, it’s best to remove the conditions that create the dialog in the first place.
- Implement a template-based workflow. In simple terms, this means strictly applying styles to your content, rather than ad hoc, or inline formatting of content. Keep your formatting in a FrameMaker template document, and keep your content in separate files. Do this, and over time you will dramatically reduce time spent on maintaining content, whether it’s in FrameMaker or any other system.
Formats available, but not covered in this post
FrameMaker also produces a great number of things that I won’t discuss here. Among them,
- EPUB (which I use to produce the digital version of my FrameMaker reference book)
- requires downloading a free validator
- Kindle formats
- requires downloading a free validator
- CHM (Microsoft HTML Help)
While the workflow for these formats is solid, I have chosen to focus on HTML5, which is not only the most flexible for your audience but also amazingly simple to set up. Additionally, the third post in the series discusses the Mobile App output, which will build on the things covered in posts 1 and 2.
Delivering HTML5 From FrameMaker 2015
- Open your FrameMaker book or chapter file. Here’s the sample file for the demo:
C:\Program Files (x86)\Adobe\AdobeFrameMaker2015\Samples\UserGuide(Arabic,English,Hebrew)\English\Personal Spaceship User Guide – EN-US.book - Open all files in your book, per the Best Practices section above. While not strictly necessary, this is a good habit to get into.
- Open File > Publish pod
- Double-click the HTML5 option
(or select Responsive HTML5 and click the Generate Selected Output button in the upper portion of the pod)
- Wait for processing
- Click the View Output button to open your files in a browser


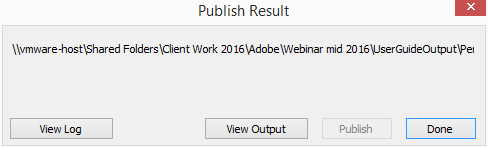
That’s it! The process is incredibly fast, and yields great results. Of course, you’ll want to customize the look and feel of the output, including colors, fonts, and branding.
Video of FrameMaker default HTML5 processing
See Post 2 for details on styles and branding.
Where to go from here
- Post 2: Customizing content and layout for HTML5 output
- Post 3: Creating iOS and Android apps from your content
- Online course: FrameMaker Digital Publishing
- Reference book: FrameMaker – Working with Content
- The first section of the book is a free EPUB download
- Available in EPUB or paperback
- Join my email list to get free techcomm, video, and online learning content. I also periodically give away consulting time to list members.
Still want more?
If all you need is a quick fix to your existing system, you can always book a phone or online meeting with me at
https://mattrsullivan.youcanbook.me
It’s the fastest and most direct way to get your problems solved.
About Matt Sullivan
Matt Sullivan is the founder of Tech Comm Tools, and has been helping folks produce better technical communication for almost 20 years. He has trained thousands of people in a dozen Adobe applications, including:
- FrameMaker,
- RoboHelp, and
- Captivate.
He specializes in improving workflow and in producing screencasts and other forms of tech comm video. He’s also a big fan of developing online courses because of their potential for depth of training and increased value to the student.
Matt helps organizations produce better content, including video and multimedia, and deliver it digitally to a web and mobile audience.
Join Matt’s email list to be the first to see a series of 25 videos highlighting Technical Communication Suite integration features. Sponsored by Adobe, the series is being billed as Getting Started with Technical Communication Suite and will serve as in introductory course to available TCS integration options.

Join over 4,300 of your peers and get my latest content sent to you for free, along with some of my all-time favorites.